How to set up the printing parameters on a Tampography Machine?
Dec 02, 2025
Setting up the printing parameters on a tampography machine is a critical process that directly impacts the quality and efficiency of the printing results. As a trusted supplier of tampography machines, I understand the importance of getting these parameters right. In this blog, I'll guide you through the key steps and considerations for setting up the printing parameters on a tampography machine.
Understanding the Basics of Tampography
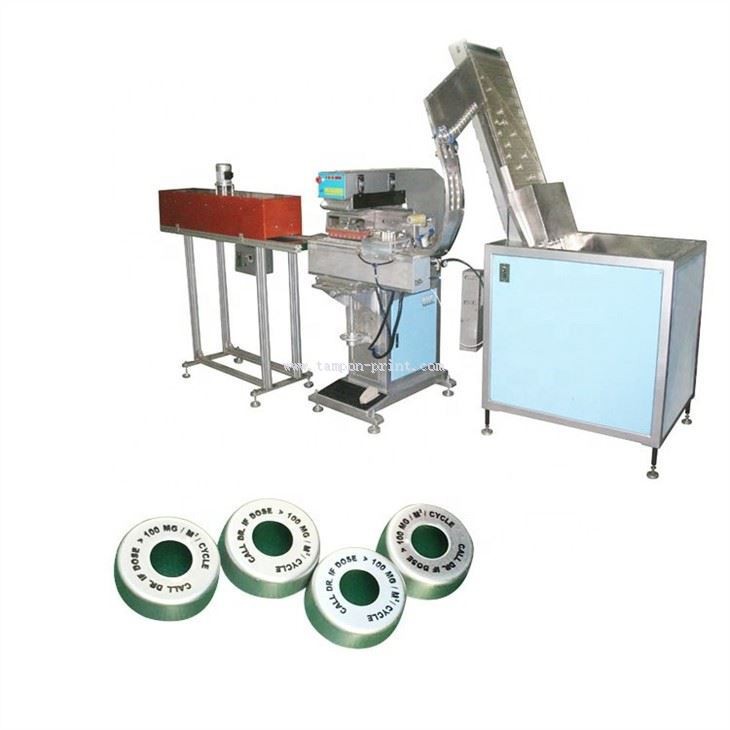
Tampography, also known as pad printing, is a printing process that can transfer a 2D image onto a 3D object. It uses a silicone pad to pick up ink from an etched plate and then transfer it onto the surface of the substrate. This process is widely used in various industries, such as automotive, electronics, and medical, due to its ability to print on irregular surfaces.
Before setting up the printing parameters, it's essential to have a clear understanding of the components of a tampography machine. The main components include the ink cup, the etched plate, the silicone pad, and the substrate holder. Each component plays a crucial role in the printing process, and their proper functioning is necessary for achieving high - quality prints.
Pre - Setup Checks
Before diving into parameter settings, conduct a thorough pre - setup check. Inspect the machine for any visible damages or wear and tear. Check the ink levels in the ink cup and ensure that the ink is of the right consistency. The etched plate should be clean and free from any debris or dried ink. The silicone pad should also be in good condition, without any cuts or deformities.
Key Printing Parameters and How to Set Them
1. Pad Pressure
Pad pressure is one of the most important parameters in tampography. It determines how well the ink is transferred from the pad to the substrate. If the pressure is too low, the ink may not transfer completely, resulting in a faint or incomplete print. On the other hand, if the pressure is too high, it can cause the pad to deform, leading to blurry or distorted prints.
To set the pad pressure, start with a moderate pressure and make small adjustments based on the print quality. You can use a pressure gauge to measure the pressure accurately. For most applications, a pressure range of 0.5 - 2 bar is suitable. However, this may vary depending on the type of substrate and the ink used.
2. Pad Speed
Pad speed refers to the speed at which the silicone pad moves during the printing process. A faster pad speed can increase the production rate, but it may also affect the ink transfer quality. If the pad moves too quickly, the ink may not have enough time to adhere properly to the substrate.
To set the pad speed, start with a slow speed and gradually increase it while monitoring the print quality. A speed of 50 - 150 mm/s is a good starting point for most applications. You may need to adjust this speed based on the viscosity of the ink and the surface characteristics of the substrate.

3. Ink Open Time
Ink open time is the time during which the ink on the etched plate is exposed to the air before being picked up by the pad. This parameter is crucial because if the open time is too short, the ink may not spread evenly on the plate, resulting in an inconsistent print. If the open time is too long, the ink may dry out, making it difficult to transfer.
The ideal ink open time depends on the type of ink and the environmental conditions. Generally, an open time of 1 - 5 seconds is suitable for most inks. You can adjust this time using the machine's control panel.
4. Plate Depth
The depth of the etched plate affects the amount of ink that can be picked up by the pad. A deeper plate can hold more ink, which is suitable for printing large or thick - inked designs. However, if the plate is too deep, it can cause the ink to overflow or make the pad pick up too much ink, leading to messy prints.
When choosing a plate, consider the requirements of your print job. For fine details, a shallower plate (around 10 - 20 microns) is recommended. For larger areas or thicker ink layers, a deeper plate (20 - 40 microns) may be more appropriate.
5. Substrate Positioning
Proper substrate positioning is essential for accurate printing. The substrate should be placed firmly in the substrate holder, and its position should be aligned with the pad and the etched plate. Any misalignment can result in off - center or distorted prints.
Most tampography machines have adjustable substrate holders that allow you to fine - tune the position. Use a measuring tool to ensure that the substrate is centered correctly.
Using Different Types of Tampography Machines
Tampo Pad Printing Machine
The Tampo Pad Printing Machine is a versatile machine suitable for a wide range of applications. When setting up the parameters for this machine, follow the general guidelines mentioned above. However, due to its specific design and capabilities, it may require some additional considerations.
For example, this machine may have a more advanced control system that allows for more precise parameter adjustments. Take advantage of these features to optimize the printing process. Also, the type of pads and inks recommended for this machine may vary, so make sure to follow the manufacturer's instructions.
SD Card Tampon Printing Machine
The SD Card Tampon Printing Machine is often used for printing on small, flat objects like SD cards. The printing parameters for this machine need to be adjusted carefully to ensure high - quality prints on these small substrates.
Since SD cards have a smooth surface, the pad pressure and speed need to be set precisely to avoid any smudging or uneven ink transfer. The ink open time may also need to be adjusted to account for the small size of the print area.
Automatic 1 Color Metal Caps Pad Printer
The Automatic 1 Color Metal Caps Pad Printer is designed specifically for printing on metal caps. Metal caps have a unique surface texture and curvature, which requires special attention when setting up the printing parameters.
The pad pressure needs to be adjusted to ensure that the ink adheres well to the metal surface. You may also need to use a special type of ink that is suitable for metal substrates. Additionally, the substrate positioning is crucial to ensure that the print is centered and properly aligned on the curved surface of the metal cap.
Troubleshooting Common Issues
Even with proper parameter settings, you may encounter some issues during the printing process. Here are some common problems and their solutions:
Faint Prints
If the prints are faint, check the pad pressure. It may be too low, preventing the ink from transferring properly. You can also check the ink levels and the ink open time. A low ink level or a short ink open time can result in faint prints.
Blurry Prints
Blurry prints are often caused by excessive pad pressure or a fast pad speed. Reduce the pressure and slow down the pad speed to see if the problem improves. Also, check the condition of the pad; a worn - out pad can also cause blurry prints.
Incomplete Prints
Incomplete prints may be due to debris on the etched plate or a misaligned substrate. Clean the etched plate thoroughly and ensure that the substrate is properly positioned.
Conclusion
Setting up the printing parameters on a tampography machine is a complex but rewarding process. By understanding the key parameters and following the guidelines mentioned above, you can achieve high - quality prints with your tampography machine.
As a supplier of tampography machines, we are committed to providing you with the best machines and technical support. If you are interested in purchasing a tampography machine or need further assistance with parameter settings, please feel free to contact us for a detailed discussion. We are always ready to help you optimize your printing process and meet your specific requirements.
References
- "Pad Printing Technology Handbook" by Pad Printing Association International
- Manufacturer's manuals for Tampo Pad Printing Machine, SD Card Tampon Printing Machine, and Automatic 1 Color Metal Caps Pad Printer.